Choosing the Right Method #
| Method | Best For |
|---|---|
| WinGet | Modern systems with internet & auto-updates |
| Download | Online resources or software requiring 2 files for installation (Packed in .zip) |
| Share | Offline environments, bulk deployment, internal IT |
1. WINGET (RECOMMENDED) #
- Requirements: WinGet Evirement installed
- Windows 10 (Install with provided example)
- Windows 11 (Build-In)
- Advantages:
• Automatically downloads the latest version
• Handles updates seamlessly
• No manual file handling required
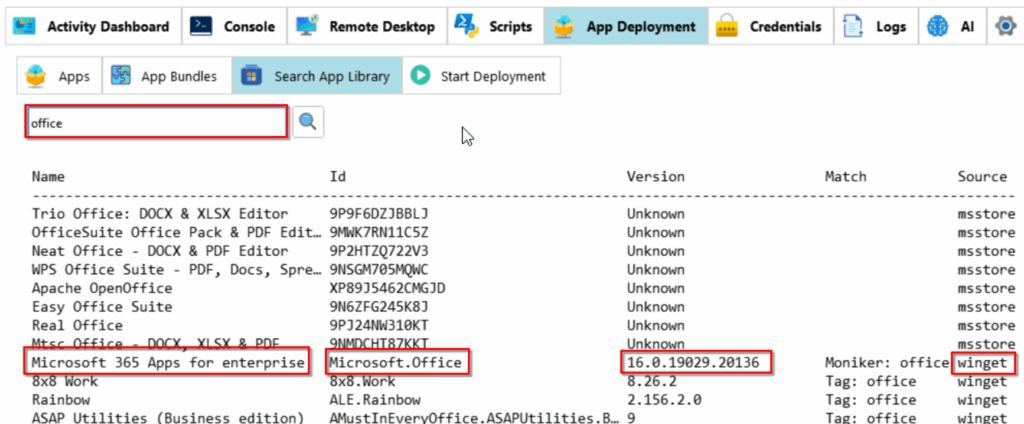
Step 1: Browse the WinGet Library #
Go to the TAB: App Deployment ➡️ Search App Library
Search for ex. “office” and press ENTER or click on the search icon.
We need the App Id for the deployment with WinGet, in this case it would be “Microsoft.Office” we also
see the Name , Version and Source which can be winget (WinGet Library) or msstore (Microsoft Store).
Select and copy the App Id “Microsoft.Office”
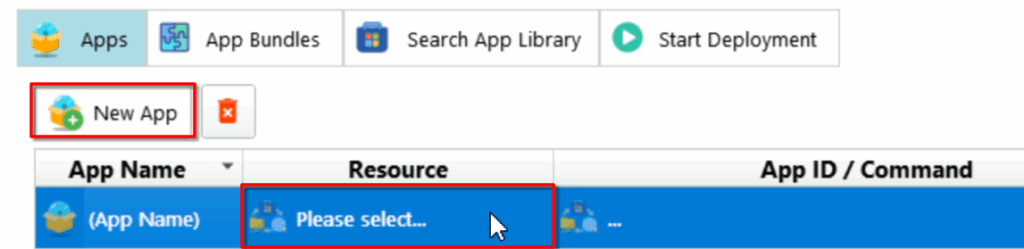
Step 2: Create a new App #
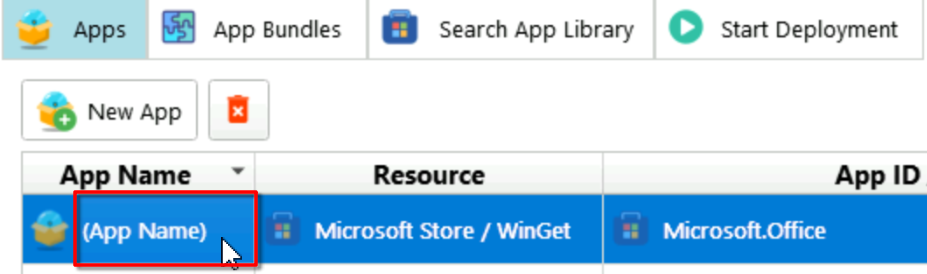
Go to the TAB: App Deployment ➡️ Apps
Click on “New App” and then double click on “Please select…” on the Resource TAB
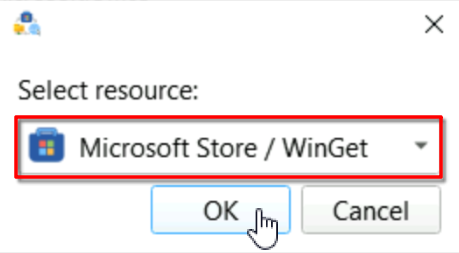
Select “Microsoft Store / WinGet” and click OK
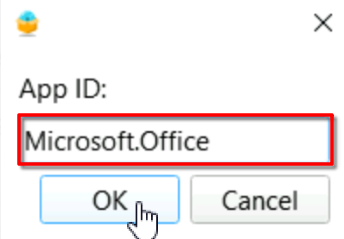
Now double-click on “App ID”

Now paste the App ID and click on OK
Almost ready, for the installation to complete and verify the installation we have to set the “Name” that Windows saves.
ServerEngine uses 2 commands to check if the installation was completed:
- Get-AppxPackage (Apps)
- Get-Package (Programs)
Get-AppxPackage -Name "*$appName*" -ErrorAction SilentlyContinue
Get-Package -Name "*$appName*" -ErrorAction SilentlyContinue
Meaning the App Name must match the name that is shown when installed.
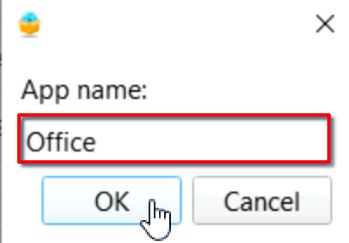
On the first deployment we can just try to use “Office” we can adjust it later to make it a better match
Double-click (App Name) and enter “Office” and click OK
Step 3: Create a Bundle and add Apps to it #
In order for the deployment to work we have to add the App to a Bundle.
The Bundle is used to deploy multiple Apps at once but you can also just add a single App.
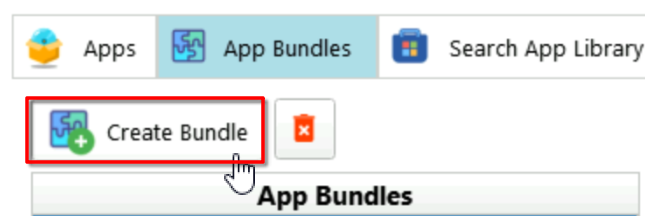
Go to the TAB: App Deployment ➡️ App Bundles
Click on “Create Bundle”
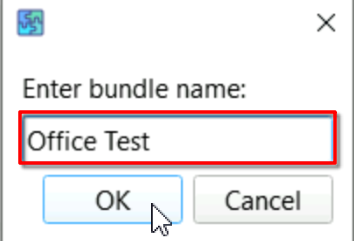
Select a Name for the Bundle, for our test we just use “Office Test”
Now select “Office Test” in Bundles and click on “Add Apps”
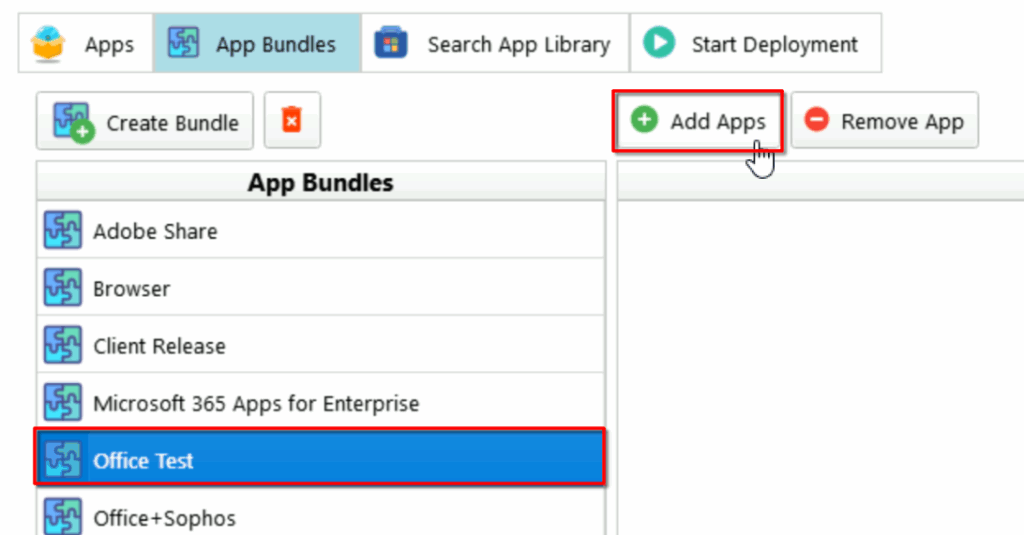
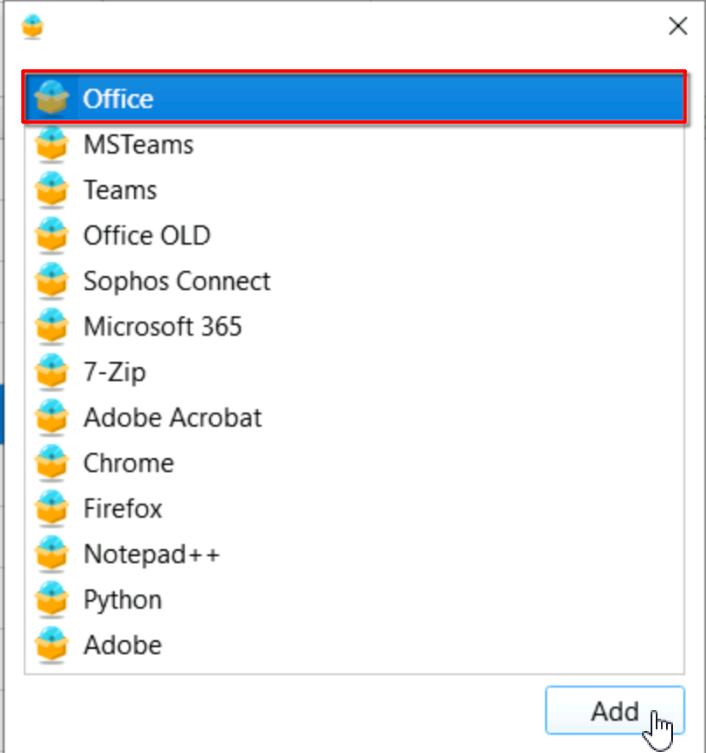
Select one or multiple Apps, in this ex. we just select “Office”
Step 4: Deploy your App Bundle #
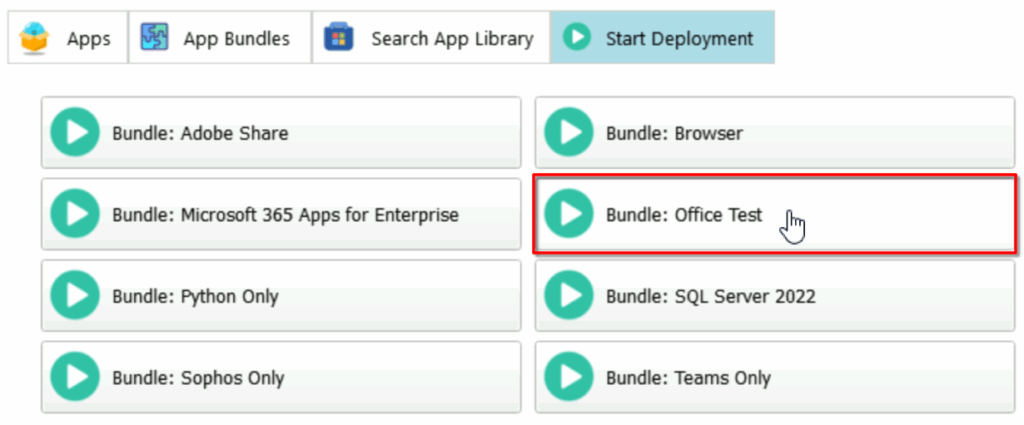
Go to the TAB: App Deployment ➡️ Start Deployment
Click on the Bundle you want to deploy, in this ex. we use “Bundle: Office Test”
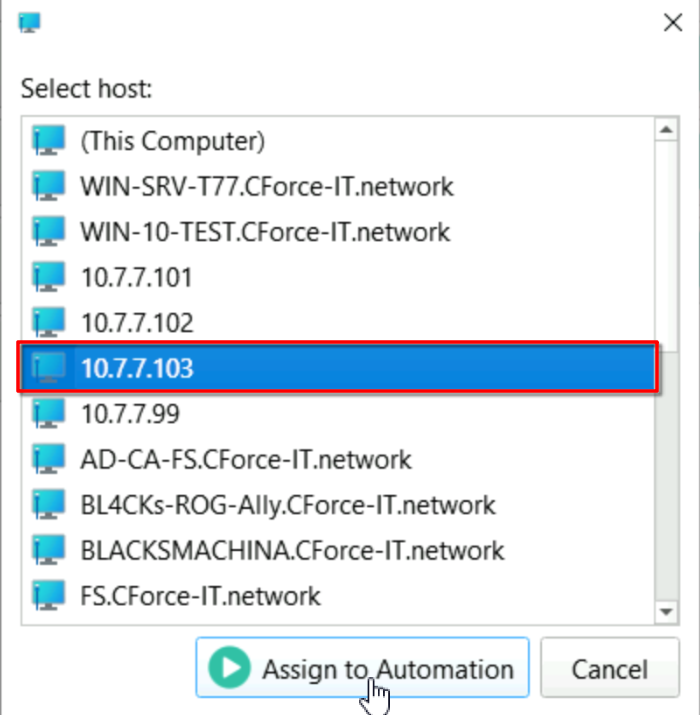
Select the host you want to deploy the Bundle to and click on “Assign to Automation”:
Go to the TAB: Activity Dashboard ➡️ Automation

The job will disappear as soon as it is completed unless there was a problem it stays in the Dashboard.
(You can disable automatic cleanup in settings if you like, uncheck “Enable automated resource cleanup”)
Now that the job disappeared, the App/Software should be installed.
We can check what happened in the Logs.
Step 5: Verify Installation #
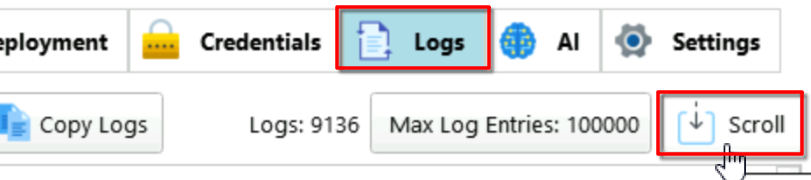
Go to the TAB: Logs
Click on Scoll (Newest logs are always at the bottom):
Now we can finally see the wierd name Office uses 😀
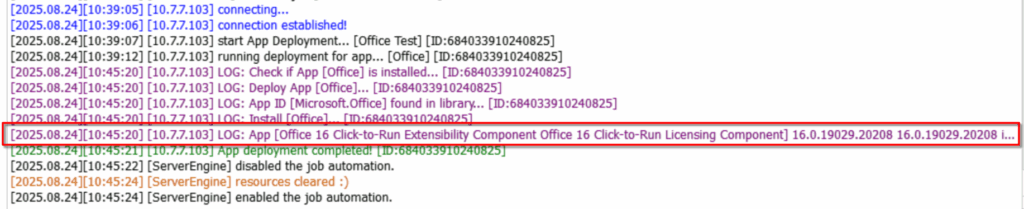
We can verify that by manually running this command on the target host:
(Get-Package -Name "*Office*" -ErrorAction SilentlyContinue).Name

Now you can use a more fitting name like “Office 16 Click-to-Run” as there may be other apps/programs containing “Office”.
2. Download from the Internet #
- Requirements: Online resource / Download link
- Advantages:
• Download from the internet
• Install .exe, .msi, .msix
• Unpack .zip and install (Requires .zip in download link url)
Step 1: Create a new App #
Go to the TAB: App Deployment ➡️ Apps
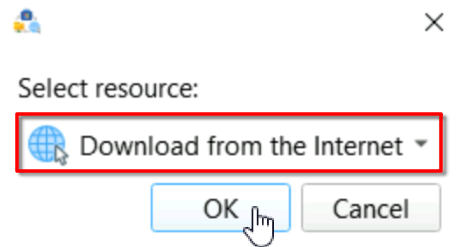
Click on “New App” and then double click on “Please select…” on the Resource TAB
Select “Download from the Internet” and click OK
Step 2: Select to download a file or a archive #
Now you have 2 options:
- Download File (.exe, .msi, .msix)
- Download Archive (.zip) (Only .zip archives are supported)
1. Download File #
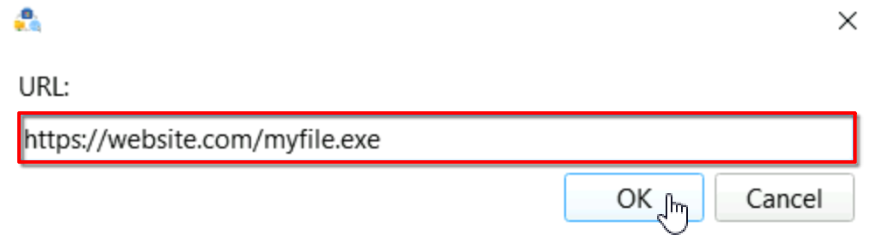
Double click on “https://” in the URL TAB

For ex.
Then double-click “<Filename> <ARG>”

ServerEngine requires the filename with suffix: (.exe, .msi or .msix)
In this ex. it would be myfile.exe and then any argument needed for installation for ex. /silent would then be:
myfile.exe /silent
In the case of a archive which we give a exact example for clear understanding
2. Download Archive #
Double click on “https://” in the URL TAB
Important to note: If you want to download a archive (.zip) must be in the URL/Download link.
It also must be a direct download link:
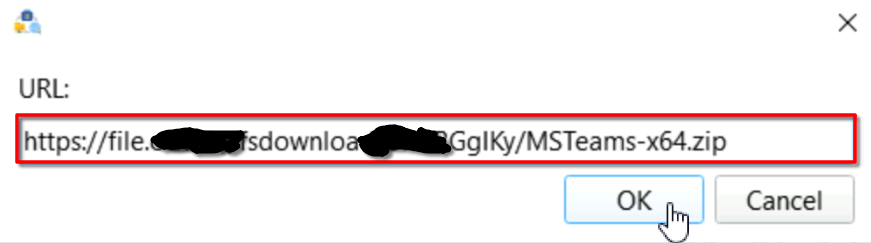
Teams is a good ex. as it requires 2 files:
- teamsbootstrapper.exe
- MSTeams-x64.msix
Then double-click “<Filename> <ARG>”
ServerEngine will take care of unpacking and navigating inside the folder, but in this case teamsbootstrapper.exe requires the full path.
Now you need to know where its download and how the folder is named after unpacking.
- All files are download to $env:temp
- Archived are unpacked with the same name: MSTeams-x64.zip -> Folder name : MSTeams-x64
the command we would look like this:
.\teamsbootstrapper.exe -p -o "$env:temp\MSTeams-x64\MSTeams-x64.msix"
Think of it as you already are in the Folder where your .zip was unpacked in 😉
Note: .exe dont need any extra but for .msi you would use:
msiexec.exe /i appname.msi /qn /norestart
and for .msix you would use:
Add-AppxPackage -Path appname.msix -ForceApplicationShutdown -ForceUpdateFromAnyVersion
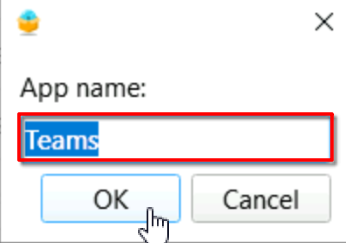
Now we name the App, “Teams” should be fine
Step 3: Create a Bundle and add Apps to it #
In order for the deployment to work we have to add the App to a Bundle.
The Bundle is used to deploy multiple Apps at once but you can also just add a single App.
Go to the TAB: App Deployment ➡️ App Bundles
Click on “Create Bundle”
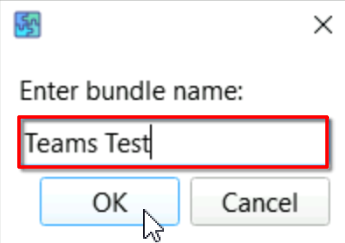
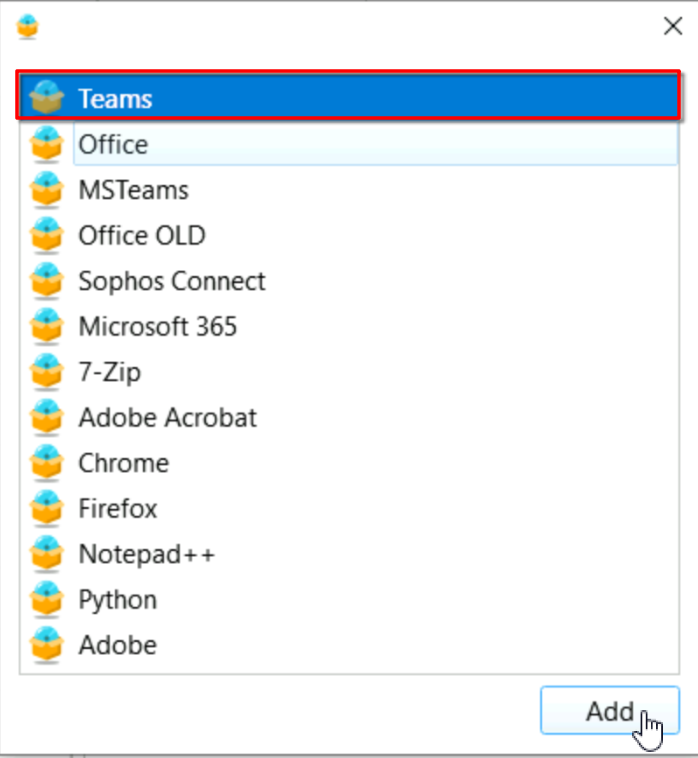
Select a Name for the Bundle, for our test we just use “Teams Test”
Now select “Teams Test” in Bundles and click on “Add Apps”
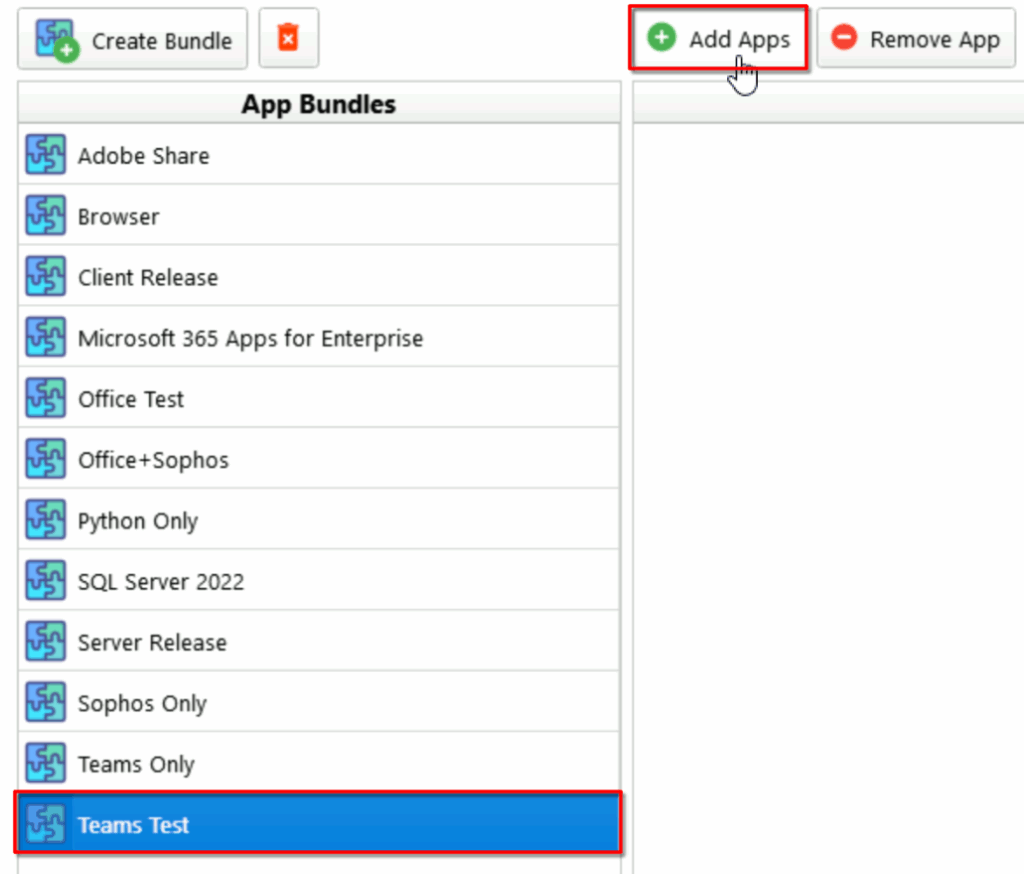
Select one or multiple Apps, in this ex. we just select “Teams”
Step 4: Deploy your App Bundle #
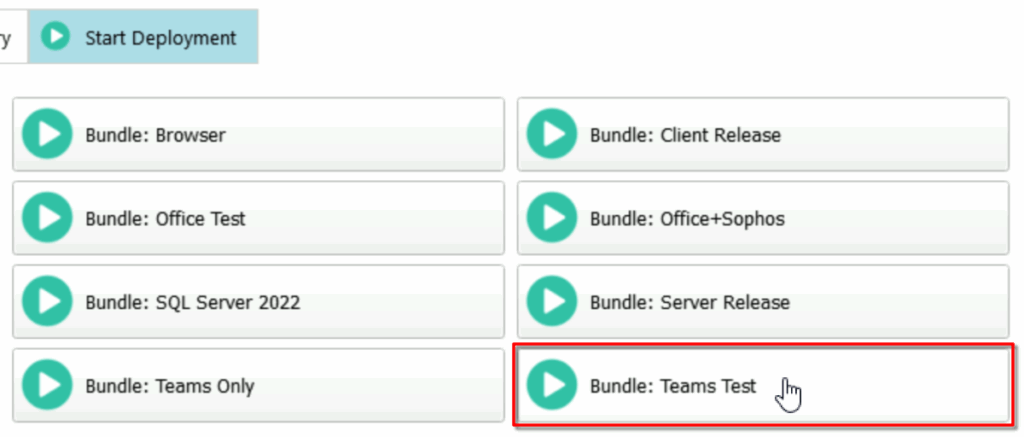
Go to the TAB: App Deployment ➡️ Start Deployment
Click on the Bundle you want to deploy, in this ex. we use “Bundle: Teams Test”
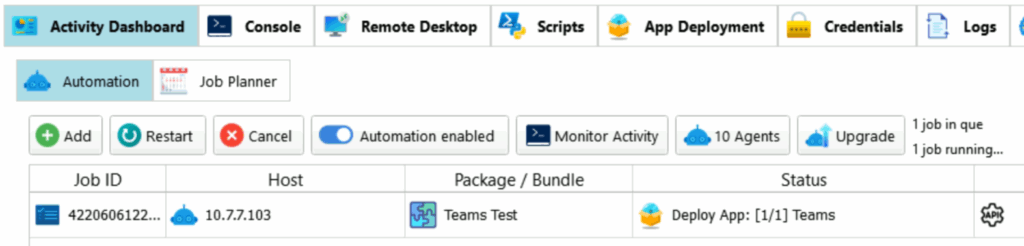
Select the host you want to deploy the Bundle to and click on “Assign to Automation”:
Go to the TAB: Activity Dashboard ➡️ Automation
Step 5: Verify Installation #
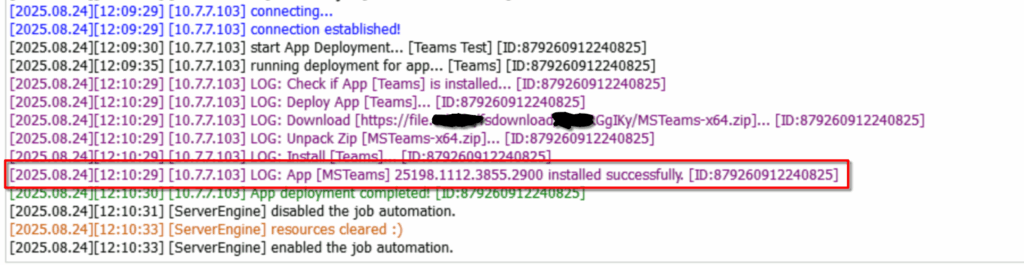
Go to the TAB: Logs
Click on Scoll (Newest logs are always at the bottom):
Now we can see the app name which now we can use to properly verify the installation
3. Share #
What if i have to deploy many hosts and the files are to large to deploy everything over the internet?
That’s what this option is for: Deploy App/Software using a SMB/NFS Share or Local location
- Requirements: A localy accessible share (Read permission are required)
- Advantages:
• Completly offline no internet required
• Install .exe, .msi, .msix
Step 1: Create a new App #
Go to the TAB: App Deployment ➡️ Apps
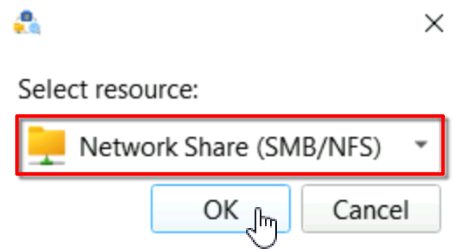
Click on “New App” and then double click on “Please select…” on the Resource TAB
Step 2: Deploy from a network share #
Select “Network Share (SMB/NFS)” and click OK
Double-click “\\server\share”

Now enter your the full path of your App where the target host has read access it can also be a network drive
If the host does not have the network drive mapped it will fail so its just better to use the full path to the share, it’s your choice 😉
- Option 1: “X:\IT\putty-64bit-0.78-installer.msi”
- Option 2 (Recommended): “\\ad-ca-fs\apps\IT\putty-64bit-0.78-installer.msi”

Then double-click “<Filename> <ARG>”

Note: .exe dont need any extra but for .msi you would use:
msiexec.exe /i .\appname.msi /qn /norestart
and for .msix you would use:
Add-AppxPackage -Path .\appname.msix -ForceApplicationShutdown -ForceUpdateFromAnyVersion
Meaning in our ex. it would then be:
msiexec.exe /i putty-64bit-0.78-installer.msi /qn /norestart
Let’ use “putty” for the name detection

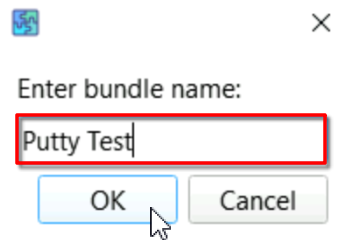
Step 3: Create a Bundle and add Apps to it #
In order for the deployment to work we have to add the App to a Bundle.
The Bundle is used to deploy multiple Apps at once but you can also just add a single App.
Go to the TAB: App Deployment ➡️ App Bundles
Click on “Create Bundle”
Select a Name for the Bundle, for our test we just use “Putty Test”
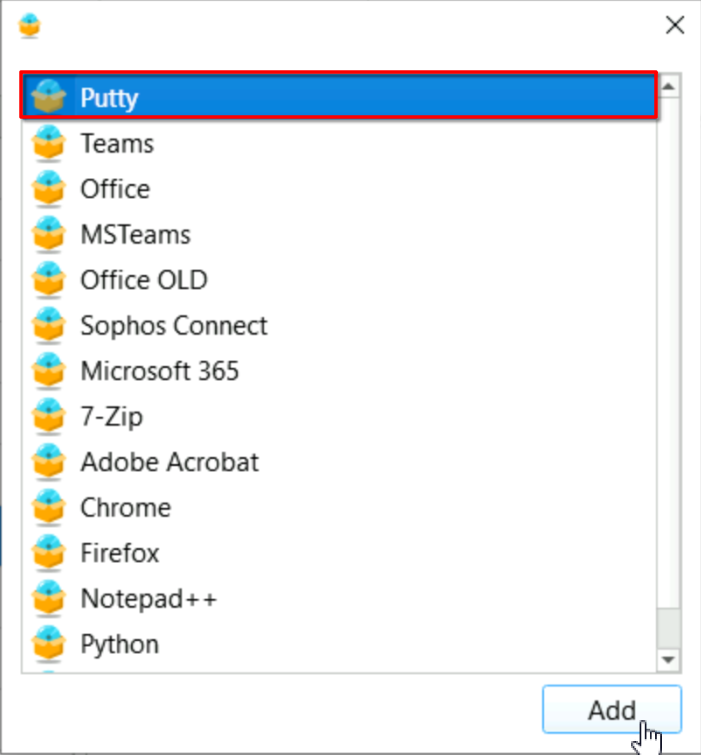
Now select “Putty Test” in Bundles and click on “Add Apps”
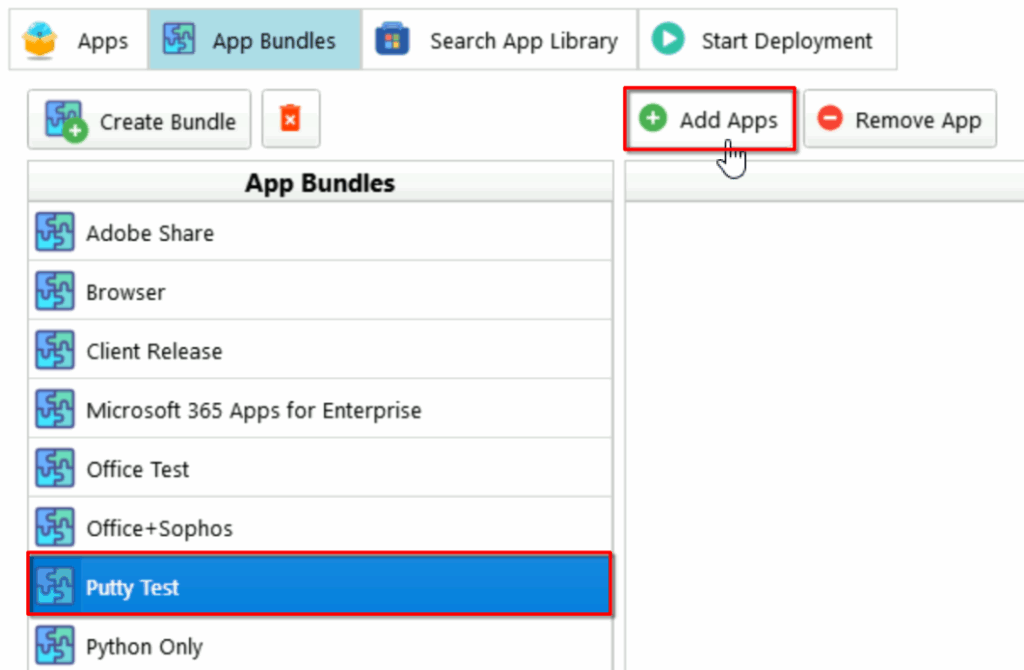
Select one or multiple Apps, in this ex. we just select “Putty”
Step 4: Deploy your App Bundle #
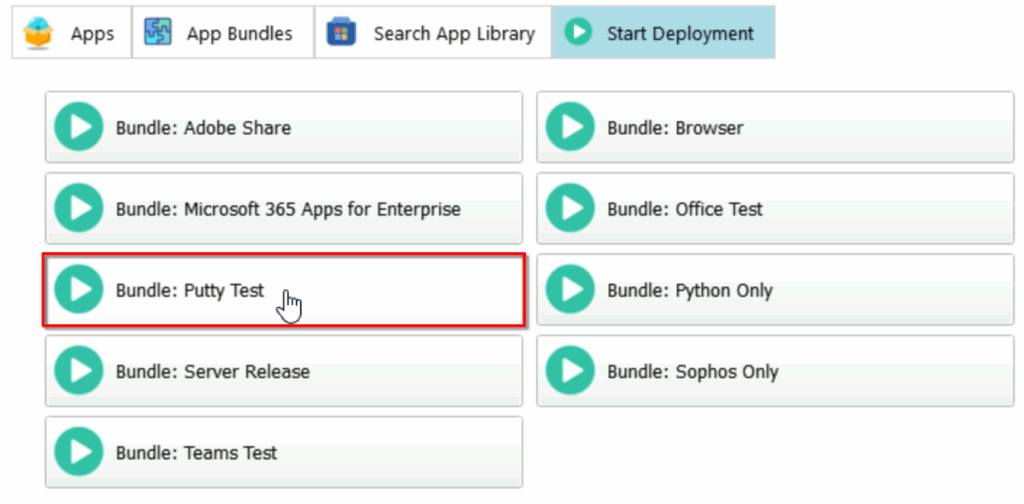
Go to the TAB: App Deployment ➡️ Start Deployment
Click on the Bundle you want to deploy, in this ex. we use “Bundle: Teams Test”
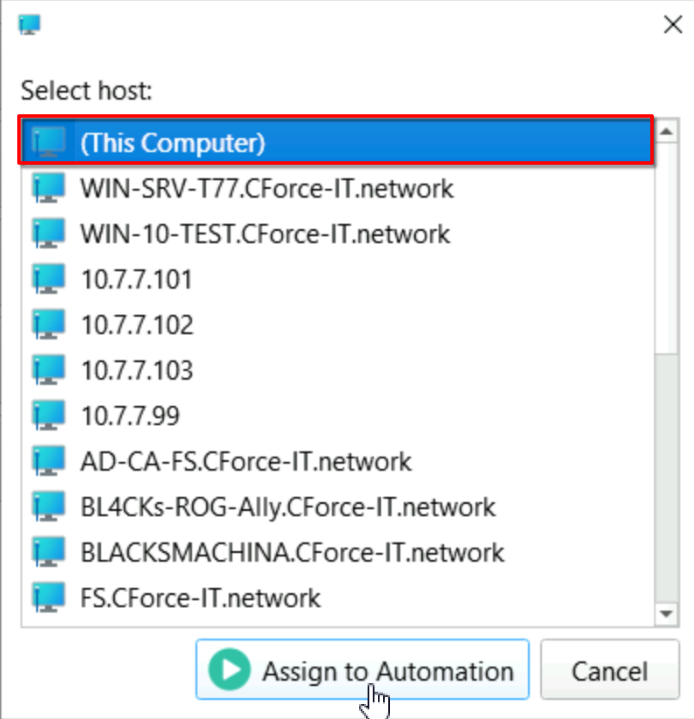
Select the host you want to deploy the Bundle to and click on “Assign to Automation”:
Go to the TAB: Activity Dashboard ➡️ Automation

Step 5: Verify Installation #
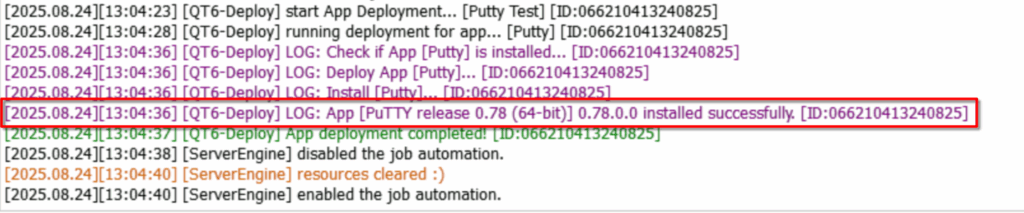
Go to the TAB: Logs
Click on Scoll (Newest logs are always at the bottom):
Now we can see the app name which now we can use to properly verify the installation
Thats it! If anything is still unclear, feel free to reach out!
Mail: [email protected]